If your garage is where “I’ll deal with it later” goes to live, you are in good company. Mine used to be a rotating pile of rakes, half-empty paint cans, soccer balls, and holiday bins that somehow migrated into the walkway like they had legs.
The fix was not buying more stuff. It was giving the garage a job description. This weekend, we are going to divide your garage into zones so every category has a home and you can actually find what you need without doing a sideways shuffle around mystery stacks.
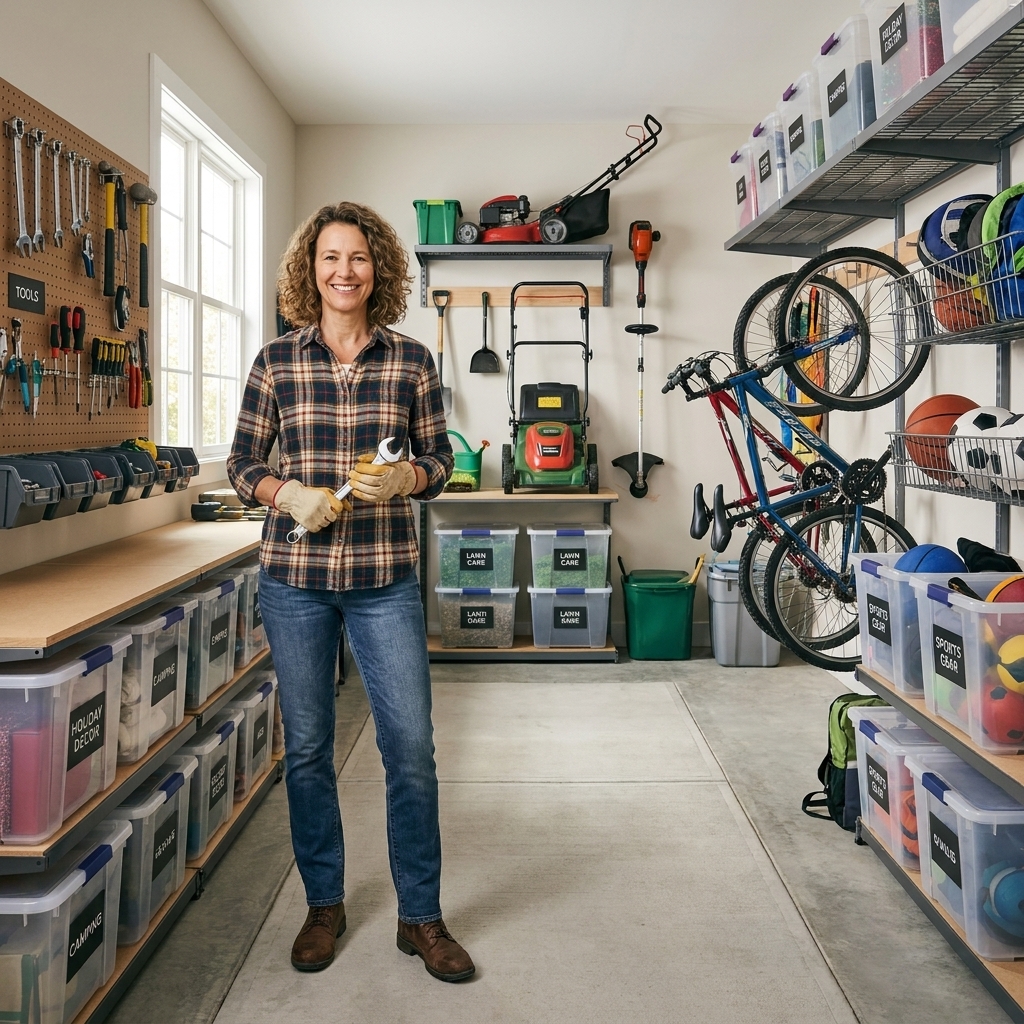
The weekend game plan
This is set up as a two-day project, but you can absolutely compress it into one long day if you are motivated and have strong coffee.
Day 1: Clear, sort, decide
- Empty the floor. Get everything into the driveway or at least into the middle so you can see the walls.
- Sort by zone categories. Tools, lawn care, sports, holiday decor, car care and entry, trash and recycling, and “house overflow.”
- Declutter fast. Toss broken tools, empty containers, and duplicates you never reach for.
- Measure your wall space. A quick tape-measure check prevents buying the wrong shelving.
Day 2: Install, contain, label
- Hang what can hang. Vertical storage is the secret sauce in most garages.
- Bin what must be binned. Seasonal and small items belong in lidded containers.
- Label the zones. Labels are not “extra.” They are what keeps the system from sliding back into chaos.
- Do a final sweep. Leave the floor as open as possible.
Before you start: safety and a realistic reset
Garages are a mix of sharp, heavy, and occasionally flammable. A few quick safety notes that make organizing smoother:
- Keep chemicals up and contained. Paint, pesticides, fertilizers, and automotive fluids should be on a sturdy shelf, ideally in a tray or bin to catch leaks. If kids are around, consider a locking cabinet.
- Propane storage varies. Many fire codes and manufacturers recommend storing propane cylinders outdoors in a well-ventilated area, not in an attached garage. Check your local rules and the label on your tank.
- Store gasoline carefully. Keep fuel only in approved containers, away from ignition sources (water heaters, furnaces, space heaters), and follow local limits for quantity and location.
- Dispose of oily rags properly. Oily, solvent-soaked, or stain rags can pose a fire risk if left in a pile. Follow product instructions and local disposal guidance, or use a listed metal rag can.
- Anchor tall shelving. Especially if you have kids who might climb.
- Prioritize clear pathways. The goal is to walk in and out without bumping into metal edges and mystery hooks.
If you have a lot of unknown containers, old paint, or questionable chemicals, plan a quick drop-off at your local household hazardous waste collection site. It is one of those annoying errands that pays you back every time you open the garage door.
Step 1: Choose your zones
We are building four main zones plus two supporting zones. The zones below cover the typical “garage mix” without getting overly precious about it.
Main zones
- Tools and DIY (hand tools, power tools, hardware, ladders)
- Lawn care (mower, trimmer, rakes, shovels, fertilizer, watering gear)
- Sports and outdoor gear (balls, bats, bikes, helmets, camping gear)
- Holiday decor and seasonal (tree, lights, inflatables, seasonal bins)
Supporting zones
- Trash and recycling (bins, extra bags, breakdown area for boxes)
- Car care and entry (car wash supplies, windshield fluid, a small “drop zone” if you enter through the garage)
Keep it boring. Boring is maintainable. The magic is not the categories, it is that each category gets a predictable home.
Step 2: Map the garage like a room
Instead of thinking “garage,” think “big utility room with a giant door.” We are going to assign the walls on purpose.
A simple layout that works in most garages
- Near the garage door: Lawn care zone (easy to roll items in and out).
- Near the house entry door: Sports gear and everyday grab-and-go items.
- Back wall or top shelving: Holiday decor and seasonal bins (high and out of the way).
- Workbench area or a side wall: Tools and DIY (where you can actually work).
Two rules I live by as a reformed messy person:
- Heavy items live low. They are easier to lift and less dangerous.
- Daily items live at eye level. If it is annoying to reach, you will stop putting it away.
One boring but important note: If you are mounting hooks, slatwall, or shelving, find studs and use hardware rated for the load and your wall type (drywall versus exposed studs versus masonry). This is not the moment for mystery anchors.

Step 3: Clear the floor (and keep it clear)
This is where most garage organizing wins or loses. If your zones end up as floor piles, you will be back in the same spot in a month.
Your floor rules
- No loose items on the floor. If it is loose, it gets a hook, a shelf, or a bin.
- Only parkable items can touch the floor. Examples: mower, snow blower, large rolling toolbox.
- Create a landing strip. An 18- to 24-inch-wide clear path is a good minimum in many garages, and wider is even better for comfort and access.
If you can, mark a simple parking spot for big equipment with painter’s tape for a week. It sounds silly. It works.
Zone setup: Tools and DIY
This zone is usually the loudest. Little bits, sharp things, and cords everywhere. The goal is “see it, grab it, put it back” without unpacking a tote every time.
What to store here
- Hand tools (hammers, screwdrivers, tape measures)
- Power tools and batteries
- Fasteners (nails, screws, anchors)
- Safety gear (gloves, goggles, ear protection)
- Paint supplies (rollers, drop cloths)
Storage that actually works
- Pegboard or slatwall: Great for hand tools and keeping them visible.
- Clear small parts organizers: One for drywall anchors, one for wood screws, one for “random but useful.”
- A single hardware bin: A lidded tote for spare hinges, brackets, and the stuff you do not need daily.
- Charging station: A shelf near an outlet for batteries so they do not migrate.
- Kid-safe option: If little hands are a factor, store sharp tools and chemicals in a locking cabinet or on a high shelf.
Quick win: the “1-minute tool reset”
Put a small open bin on the workbench labeled “return.” When you are done with a project, toss stray tools in there. Once a week, put them back on the wall. This saves you from the classic “I’ll do it later” tool sprawl.

Zone setup: Lawn care
Lawn care items are awkward shapes, and they love to fall over dramatically the moment you turn your back. Give them a wall, not a pile.
What to store here
- Rakes, shovels, brooms
- Hose and nozzle
- Fertilizer and grass seed
- Mower, trimmer, leaf blower
- Garden gloves and small hand tools
Storage that works
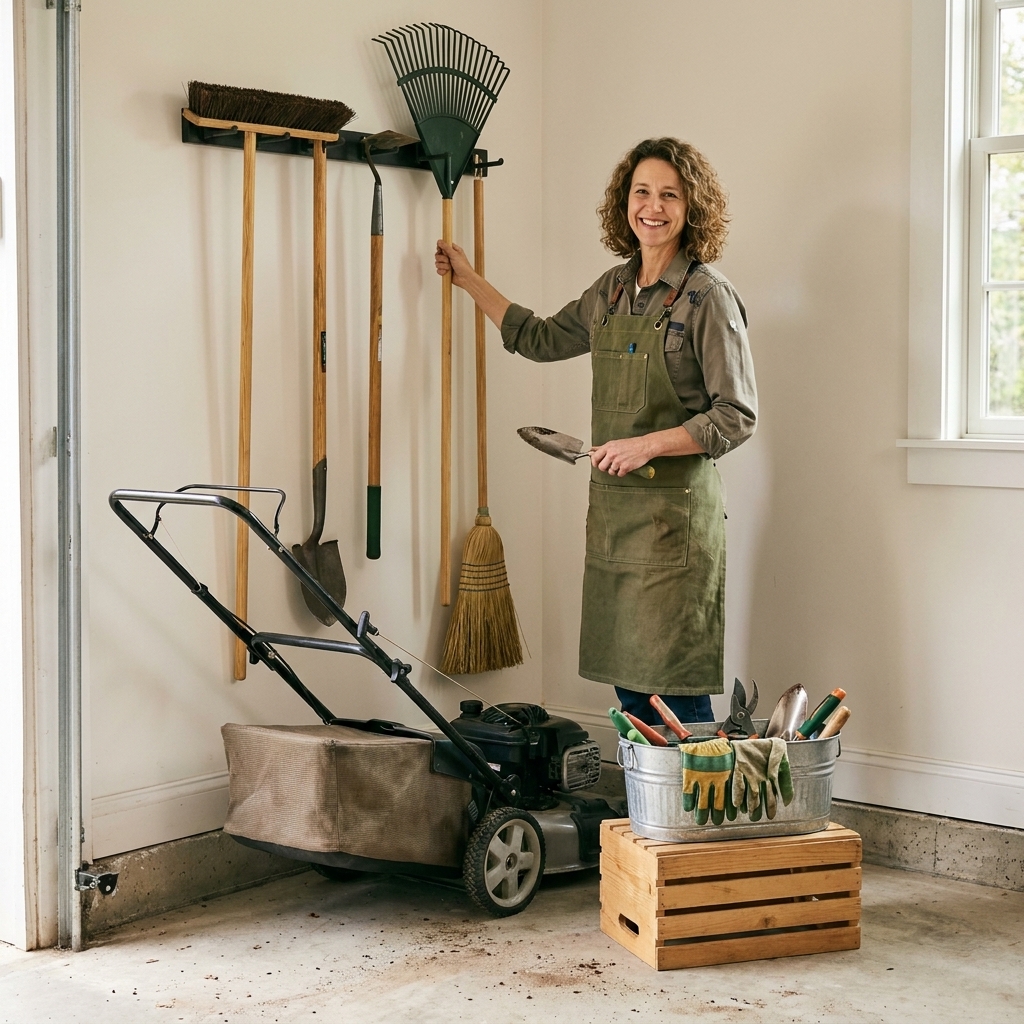
- Heavy-duty hooks or a rack system: For long-handled tools.
- A hose reel: Wall-mounted if possible.
- A lidded bin for small garden tools: Keeps hand pruners and gloves together.
- A shallow tray bin for chemicals: Fertilizer and weed killer stay contained and upright.
Placement tip
Put this zone closest to the garage door. You should be able to roll the mower out without rearranging the entire building.
Zone setup: Sports and outdoor gear
This is the zone that multiplies on its own. One ball becomes fifteen. One bike becomes three plus a scooter and a random frisbee that appears from another dimension.
What to store here
- Balls, bats, rackets
- Helmets, pads, skates
- Camping chairs and coolers
- Bikes, scooters, skateboards
- Pool toys or beach gear
Storage that works
- Open bins or wire baskets: For balls and loose gear. Open is key so kids can actually use it.
- Individual hooks: For helmets and backpacks.
- Bike storage: Wall hooks or a simple floor rack, depending on your wall strength and patience level.
- Tall, narrow shelving: For coolers and folded chairs.
My reformed-messy rule for this zone
Make it easy to put away without adult-level precision. If the storage requires perfect folding or Tetris stacking, it will fail by Tuesday.

Zone setup: Holiday decor and seasonal
This zone should be boring and high up. The goal is to make seasonal stuff easy to retrieve without letting it creep into everyday space.
What to store here
- Holiday bins (winter, fall, spring)
- Wrapping supplies
- Outdoor lights and extension cords
- Inflatables and specialty decor
Storage that works
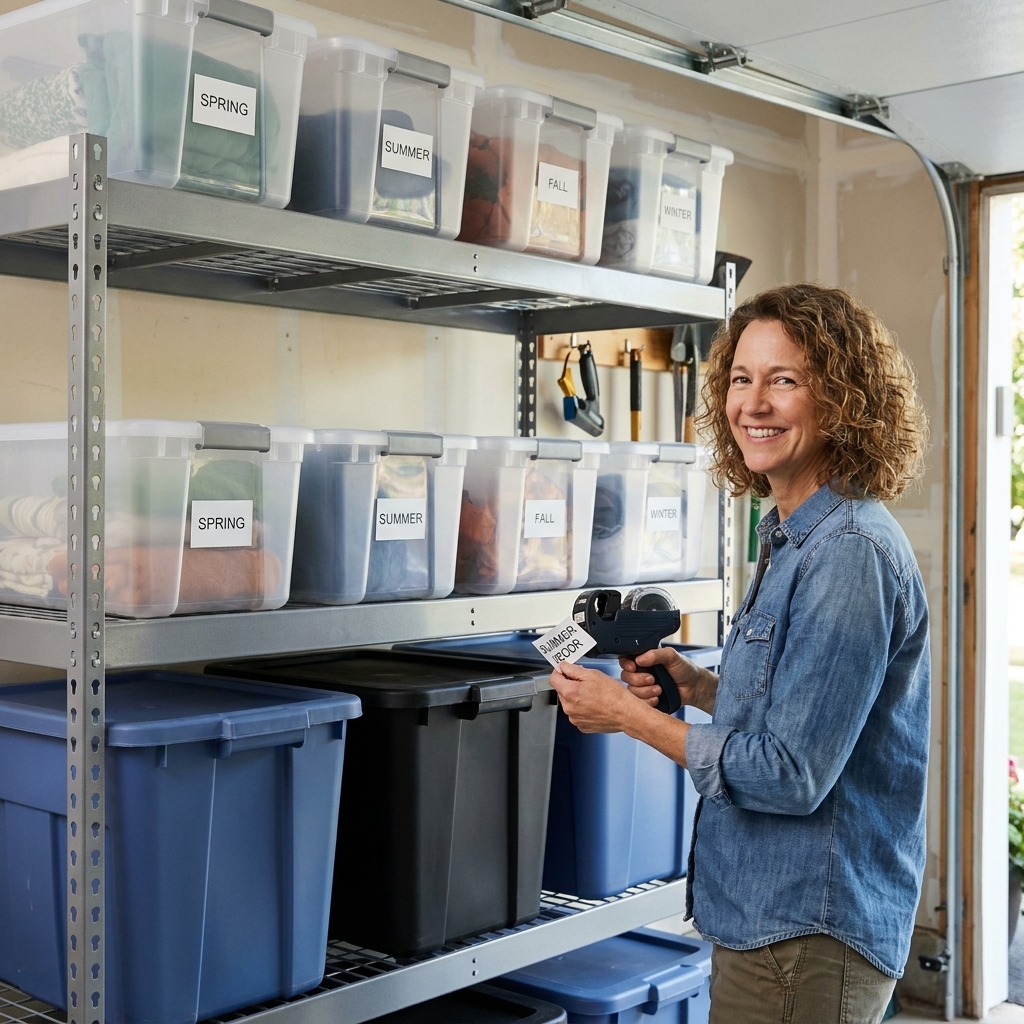
- Matching lidded totes: They stack safely and look calmer.
- Clear bins when possible: If you can see it, you are more likely to use it and less likely to buy duplicates.
- Overhead racks or top shelves: Great for seasonal items you touch once or twice a year. Check the load rating, anchor properly into joists or studs, and keep heavy bins off overhead storage.
- Soft-sided bags for bulky, lightweight items: Wreaths and inflatables do well in bags that compress.
Labeling that prevents rummaging
Label by holiday and by location. Example: “Holiday: Winter | Living Room” or “Halloween | Front Porch.” This stops the annual “open every bin to find the one thing” situation.
Supporting zones that help
Trash and recycling zone
Give it a defined footprint so it does not drift into your storage. If you have the space, add a small spot for flattening boxes.
- Two sturdy bins
- A hook for extra bags
- A narrow vertical space for collapsed cardboard
Car care and entry zone
If your household comes in through the garage, create a tiny landing area. It prevents the classic “everything gets set on the nearest surface” mess.
- A small shelf or cabinet for car supplies
- A bin for reusable grocery bags
- A hook strip for keys or dog leashes if needed
Garage climate and pests
Garages get humid, dusty, and interesting to mice. A few small choices prevent big gross surprises later.
- Skip cardboard long-term. Cardboard attracts pests and absorbs moisture. Move keepsakes, fabric decor, and paper goods into plastic totes with tight lids.
- Get bins off the floor in damp garages. Use shelving so a small water event does not ruin everything.
- Keep soft goods sealed. Sleeping bags, seasonal pillows, and kids gear do better in sealed bins or heavy-duty bags to deter pests and mildew.
The shopping list (keep it simple)
You do not need to buy a full garage system to get a functional garage. Start with the basics and add only when a category needs a real home.
Good starter supplies
- Heavy-duty wall hooks and a long-handled tool rack
- One sturdy shelving unit (metal or heavy plastic)
- 4 to 8 clear lidded bins (same size if possible)
- 2 open bins or wire baskets for sports gear
- A small parts organizer for hardware
- Painter’s tape (for mapping zones temporarily)
- Label maker or thick marker and label tape
- One drip tray or plastic bin for chemicals
If you love clear acrylic bins like I do, save them for indoor spaces. In garages, go for rugged plastic that can handle temperature swings and being bumped by a lawn mower.
One-week test drive
This is the part that keeps your garage organized long-term. Instead of installing everything permanently and hoping it works, do a short test.
- Set zones with painter’s tape. Mark where each category lives.
- Live with it for one week. Notice what ends up on the floor and where you naturally drop items.
- Adjust one thing at a time. Move the sports bins closer to the door, lower a hook row, add one more tote. Small tweaks beat a full redo.
The 20-minute Sunday reset
I am a big believer in a quick weekly reset because it prevents the “someday” pile from coming back.
Set a timer and do this
- 5 minutes: Put loose items back into their zones.
- 5 minutes: Return tools to the tool wall and dump the “return” bin.
- 5 minutes: Toss trash, break down any cardboard.
- 5 minutes: Quick sweep of the walkway.
If you do nothing else, protect the floor. A clear floor is what makes the whole garage feel usable.
Troubleshooting
“My garage is too small for zones.”
Zones can be as small as a single shelf section. Use vertical storage, and define micro-zones: one hook strip for sports bags, one bin for balls, one shelf for holiday bins.
“I cannot park in the garage because of storage.”
Start by moving seasonal decor and rarely used items up high or to the back wall. Parking space is usually lost to floor piles, not shelves. If you need to, cap the number of bins each zone gets.
“My family will not keep it up.”
Make the zones obvious and low-effort: open bins for kids, big labels, hooks at reachable heights. A system that requires perfect behavior will fail. A system that is easy will win.
“What do I do with random house overflow?”
Create one tote labeled “House Overflow” with a date on it. If you do not pull anything from it in 60 days, it is a strong sign it can be donated or relocated inside properly.
Garage zone checklist
- Tools and DIY zone has visible storage (pegboard, hooks, or drawers)
- Lawn care zone is closest to the garage door
- Sports gear has open, easy-to-use bins and hooks
- Holiday decor is high and labeled by season and location
- Chemicals are upright, contained, and stored safely for your household
- Walkway is clear and stays clear
- Weekly reset routine is realistic (20 minutes or less)
If you want one guiding principle, let it be this: give the garage fewer decisions. When every item has an obvious home, you stop negotiating with the mess.