If you have ever opened a kitchen cabinet and gotten lightly bonked by a plastic lid that launched itself into freedom, welcome. This is one of those organizing problems that makes tidy people feel smug and the rest of us feel personally attacked.
The good news is you do not need a Pinterest-perfect drawer of matching glass containers to win here. You need a system that assumes real life: rushed leftovers, kids “helping,” and that one container that never comes back from work.
The goal (and the rule that fixes everything)
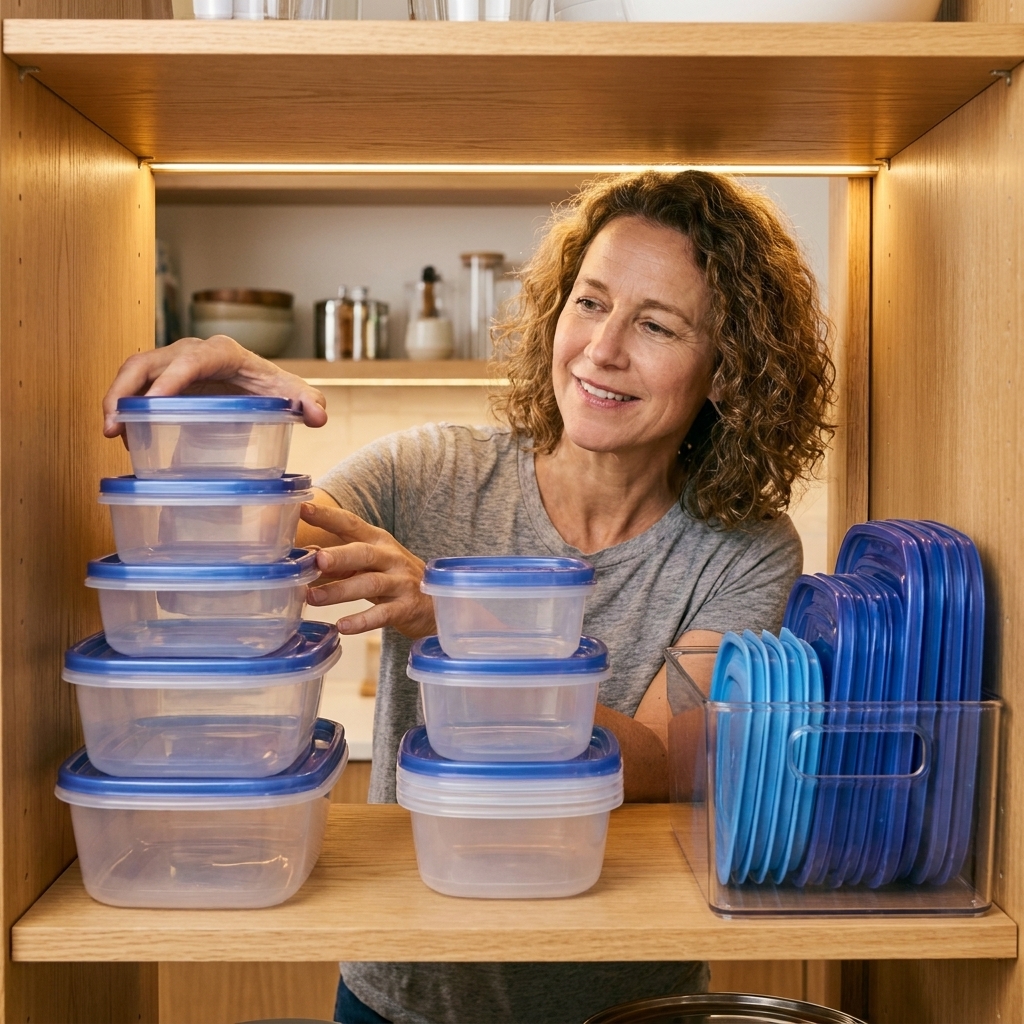
The goal is not “perfectly curated food storage.” The goal is one smooth motion: you can grab a container and its lid without digging, sliding stacks, or starting an avalanche.
Here is the rule that makes that possible:
- Containers nest.
- Lids stand.
When lids are stacked flat, they shift, slide, and become a chaotic game of 52 Pickup. When lids are stored upright like files, you can flip through them and pull the right one without disturbing the rest.
Step 1: Do a 10-minute “lid match” purge
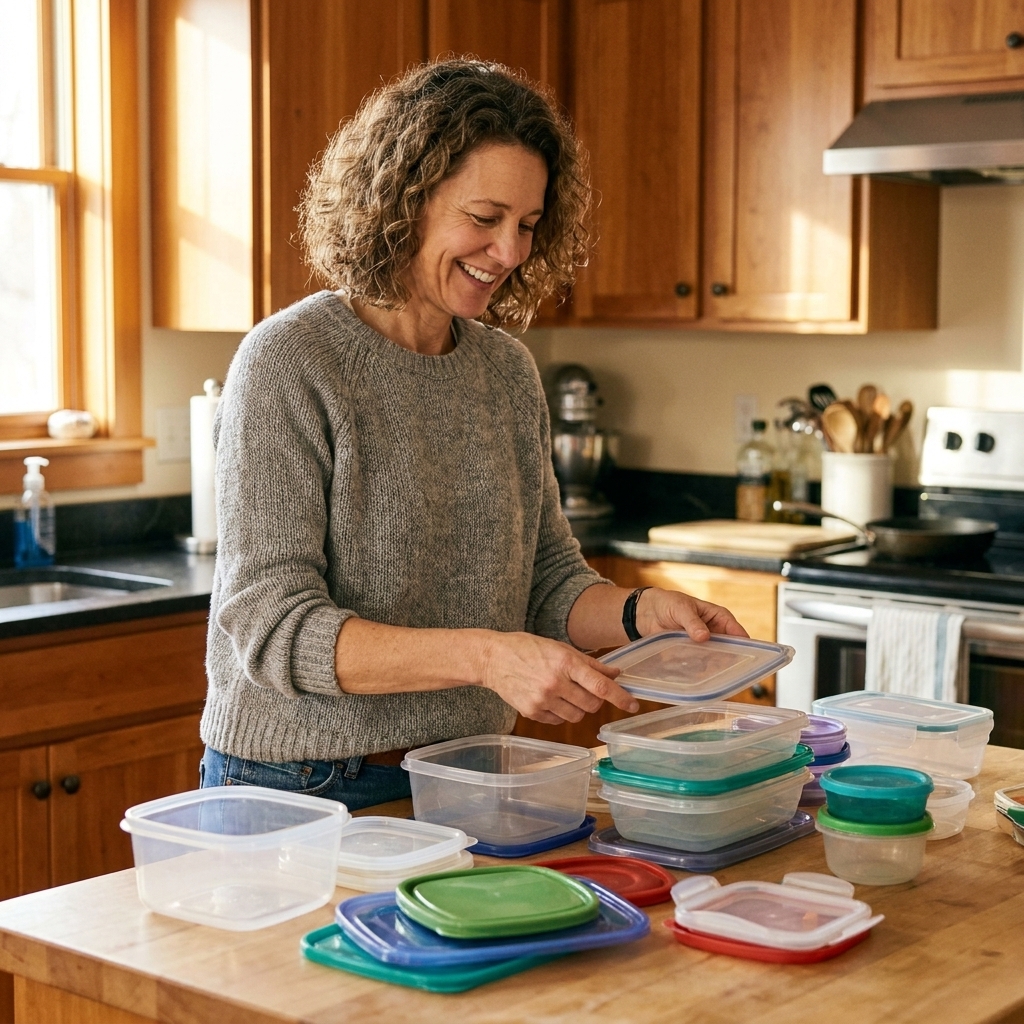
This is the unglamorous part, but it is where the magic happens. Set a timer for 10 minutes. Put a towel on the counter and dump everything out.
Quick sort
- Make three piles: containers, lids, and “mystery pieces.”
- Match as you go. Every time you find a match, set that pair aside.
- Be ruthless with orphans. If a lid has no container (or vice versa), it is not “useful someday.” It is clutter today.
If you are nervous about tossing orphans, give them a short grace period: put them in a small bag labeled “Last Chance” and write the date on it (or set a two-week reminder on your phone). If it is still there after two weeks, let it go.
Step 2: Choose your container zone
Your food storage should live where you actually use it. For most households, that is either:
- Near the fridge (leftovers zone)
- Near the dishwasher (put-away speed zone)
- Near the prep area (packing lunches zone)
Pick one cabinet or one deep drawer. One. The second it spreads into two places, it starts breeding.
Step 3: Pick a storage method
I will give you a few options. The right one is the one that matches your space, not the one that looks prettiest online.
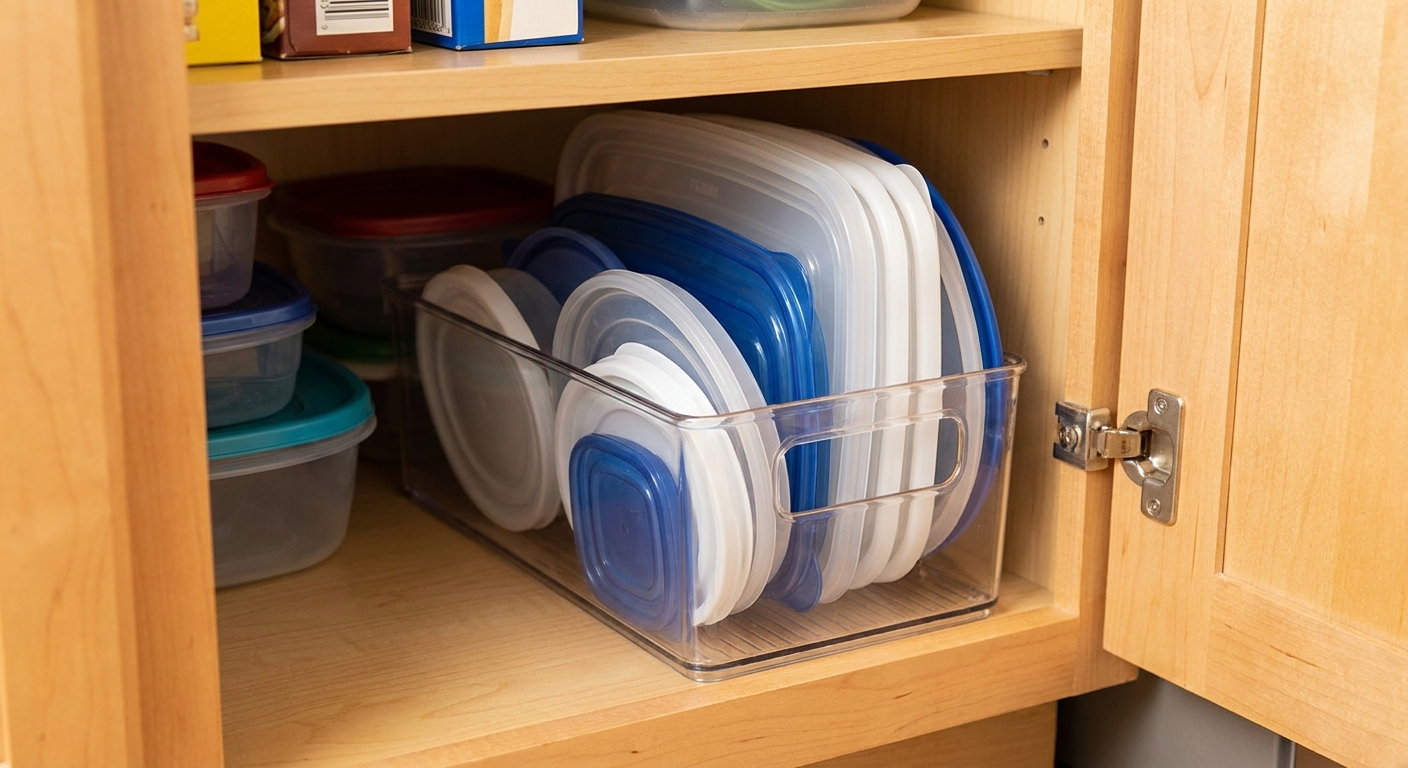
Method A: The Lids File Bin
This is the simplest, most foolproof system for mixed brands and real-life kitchens.
- Containers: nested by shape and size in short stacks.
- Lids: stored upright in a bin or rack like files.
What to use for the lid bin:
- A narrow handled bin
- An acrylic bin (if you love seeing everything)
- A clean shoebox-sized bin (yes, really)
- A lid organizer rack
How wide should the bin be? Wide enough that lids stand up without bending, with just a little side-to-side support. Think “cereal-box-ish” width, or roughly the span of your hand. If the bin is too wide, lids flop. If it is too narrow, lids bow and pop out.
Method B: The Drawer Divider
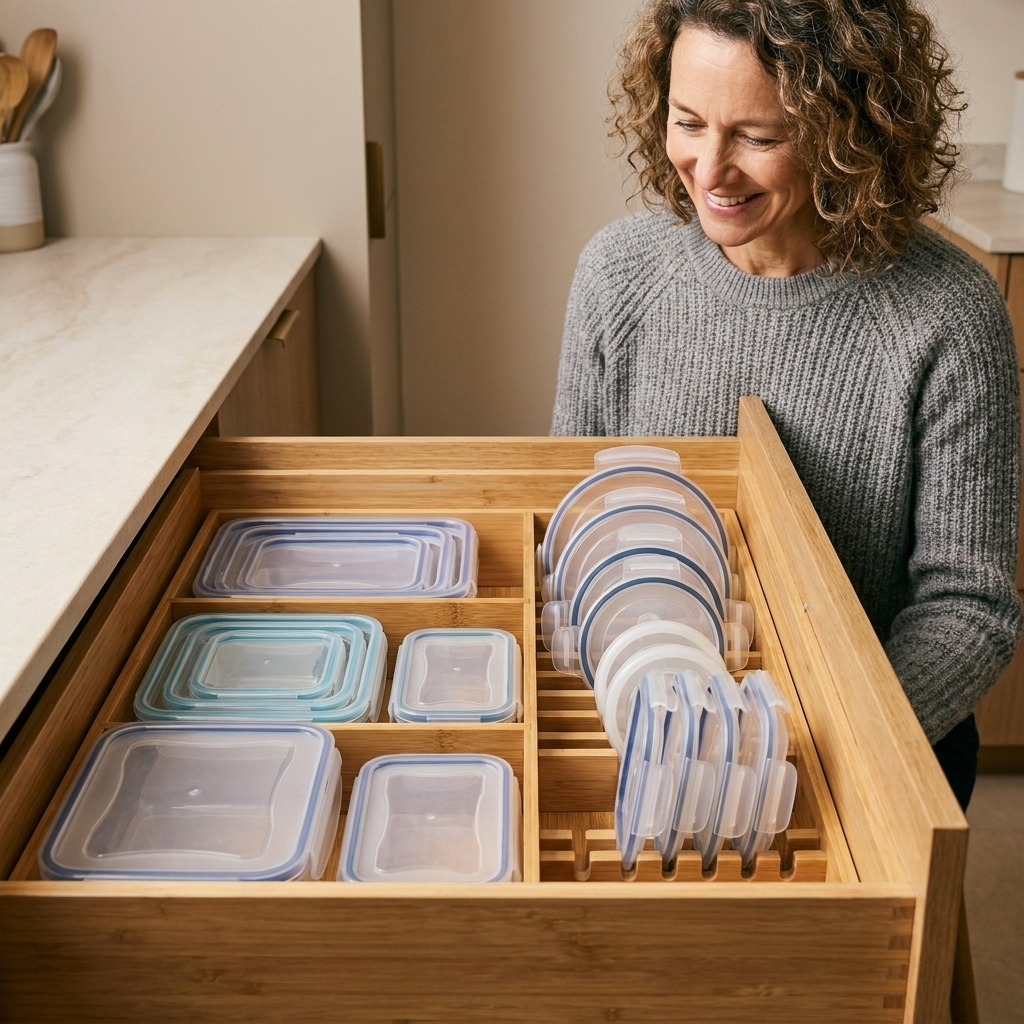
If you have a deep drawer, you can make this ridiculously easy.
- One section: nested containers
- One section: upright lids behind a divider
Use:
- Expandable drawer dividers
- One or two bins to create lanes
Tip from my reformed-messy life: aim for a little breathing room. Even 10 to 20 percent open space gives your hands clearance and keeps the drawer from becoming a shove-it-and-pray situation.
Method C: Match-and-Stack
If you have a matching set where every container uses the same lid shape, you can keep lids stacked because you are not hunting for a specific one.
- Containers: nest by size
- Lids: one tidy stack, or two stacks by size
This works best when the stack stays easy to lift and split with one hand. If you have a lot of lids and the pile turns into lid Jenga, switch to upright filing.
Step 4: Set a realistic limit
This is the part most of us skip, and it is why the mess returns.
Your cabinet has a natural capacity. If you exceed it, you will be “organizing” forever.
A limit that prevents avalanches
- 2 to 3 short stacks of containers (by shape)
- 1 lid bin that lets the cabinet door close easily
- 1 small bonus zone for specialty pieces (salad spinners, divided lunch boxes) if you truly use them
If your collection does not fit in that footprint, the answer is not more bins. The answer is fewer containers.
Step 5: Make it tired-proof
I say this with love because I am future me’s biggest enemy when I am tired.
Easy upgrades that keep it working
- Store lids closest to the door. That is the part you reach for first.
- Keep stacks short. Tall stacks tip and cascade.
- Group by shape, not brand. Squares with squares, rounds with rounds. Your brain finds shapes faster than logos.
- Use a grippy shelf liner under the container stacks if your shelves are slick.
And if you live with other humans: make the “right” spot the easiest spot. If the lid bin is buried behind the containers, no one will use it. Not even you.
What to do about annoying stuff
Problem: Lids that warp and never fit again
If a lid does not snap on easily, it does not earn a spot in your cabinet. Recycle only if your area accepts that plastic, and if it is the right size and resin type for your program. (A lot of curbside recycling will not take certain lids or small pieces, so check your local rules.) Otherwise, dispose of it. Keeping “maybe lids” is how the chaos rebuilds.
Problem: Takeout containers multiplying
Pick one size you actually reuse and keep a small stack. Everything else goes. My rule: if the lid is flimsy or stained, it is a no.
Problem: Kids lose lids constantly
Give kids their own small set of containers in a separate bin for snacks and lunches. Fewer pieces circulating means fewer mismatches.
Problem: Mixed brands with similar lids
This is where upright lid filing shines. Add a second divider in the lid bin so you can create two lanes: “square-ish” and “round-ish.”
Problem: Containers that look gross or smell weird
If plastic is heavily stained, odor-retaining, cracked, or warped, retire it. Aside from being unpleasant, those are the pieces that never stack right and never seal right, which is how the cabinet chaos sneaks back in.
Problem: Deep or high cabinets
If you have a cabinet that eats containers in the back, do not fight it. Put your stacks in a pull-out bin (or even a sturdy handled basket) so you can slide the whole set forward. A turntable can also help for short stacks, as long as it is stable and not overloaded.
The 3-minute weekly reset
I do this during my Sunday kitchen reset when I am waiting for the dishwasher.
- Put stray lids back in the lid bin.
- Re-nest containers into their stacks.
- Pull 3 orphans max and decide: match, recycle (if accepted), or toss.
That is it. The goal is tiny maintenance, not a monthly rage-clean of the cabinet.
Shopping list (only if you need it)
You can do this with what you have, but if your cabinet layout fights you, these are the few items that actually earn their keep:
- 1 narrow bin for upright lids (handled bins are great)
- 1 to 2 shallow bins to corral container stacks (optional)
- Expandable drawer dividers if using a drawer system
- Non-slip shelf liner if stacks slide
- A pull-out bin if your cabinet is deep and awkward
My bias as an acrylic-bin lover: clear bins make it easier to keep up because you can see the problem starting before it becomes a full-blown cabinet avalanche.
FAQ
Should I store containers with lids on?
Only if you have a small set and plenty of space. For most of us, lids-on wastes space and makes it harder to find what you need. Nest containers and file lids instead.
What if my containers are different shapes and sizes?
That is normal. Sort by shape first (round, square, rectangular), then nest within each shape from largest to smallest. Upright lid storage handles the variety.
How do I keep my cabinet from getting messy again?
Two things: keep stacks short and do the 3-minute weekly reset. The system survives because it is easy to maintain when you are tired.
Is switching to glass worth it?
Glass can be great, but it is not required to be organized. If you love the idea, start small by replacing your most-used sizes first. The system in this article works either way.
Should I label lids and containers?
Optional, but helpful if you have a few nearly identical sets. A tiny dot from a paint pen or permanent marker on the underside (one dot for one set, two dots for another) can make matching faster without making your cabinet look like a science experiment.
A final pep talk
If this cabinet has been a problem for years, you are not failing. The default way most of us store containers invites chaos: stacks of slippery lids and too many mismatched pieces.
Remember the rule: containers nest, lids stand. Give it one cabinet, one lid bin, and one quick weekly reset. You will feel the difference the next time you put leftovers away without bracing for impact.