Deep pantries are sneaky. They look generous until you realize they are basically a cave where peanut butter goes to retire. If you have ever bought a second bottle of olive oil while the first one was quietly aging in the back, you are in the right place.
I am a reformed messy person, which means I love any system that does two things: makes the “back row” visible and makes putting groceries away so easy that I will actually do it. Let’s set up your pantry so food gets used, not lost.
Why deep shelves waste food
Deep pantry shelves create three predictable problems:
- Out of sight, out of mind: Anything behind the front row is basically invisible.
- Stacking turns into hiding: When items pile in front of each other, older food gets buried.
- Putting groceries away feels annoying: If it takes effort to reach the back, you will default to shoving things wherever they fit.
The fix is not perfection. The fix is access (pull items forward), categories (zones), and rotation (first in, first out).
Measure and reset first
Step 1: Empty one shelf
If you try to empty the whole pantry at once, you will end up eating crackers over the sink while questioning your life choices. Pick one shelf. Finish it. Move down.
Step 2: Measure three things
- Shelf depth: Front edge to back wall.
- Shelf width: Side to side, and note any trim that reduces usable space.
- Shelf height clearance: Bottom of the shelf above to the shelf surface.
Write these down in your phone. It saves you from buying bins that fit perfectly in your cart and not at all in your pantry.
Step 3: Do an expiration sweep
Trash anything that is expired, smells off, or you know you will not eat.
If it is unopened and unexpired, put it in a donate box immediately so it actually leaves your house. (Quick reminder: food banks have different rules, so a fast check of your local guidelines can save you a wasted trip.)
Golden rule: nothing loose in back
If an item can slide backward, it will. Deep shelves work best when everything is either:
- Contained in a bin you can pull forward, or
- Lifted on a riser so you can see over the front row, or
- Stood up in a file-style organizer so it cannot create a packet avalanche.
Best organizers for deep shelves
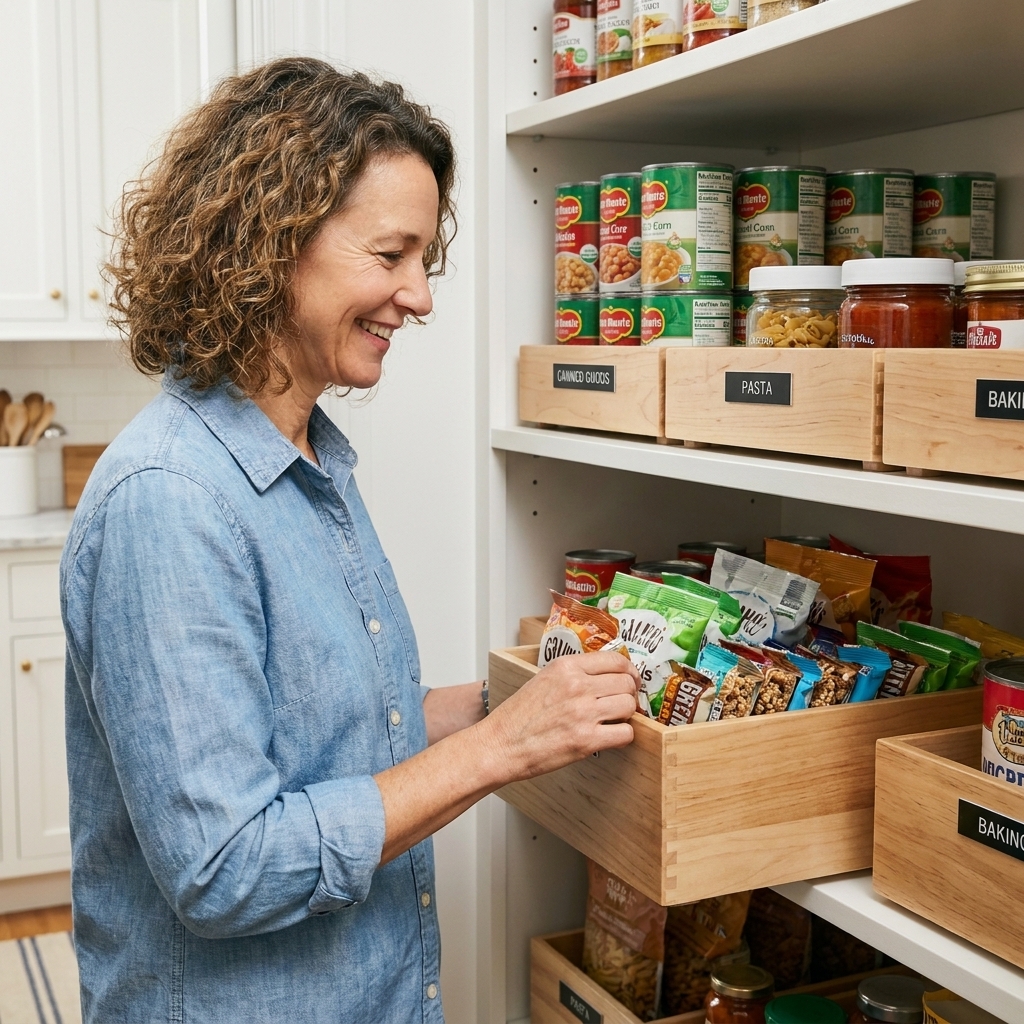
1) Pull-out bins
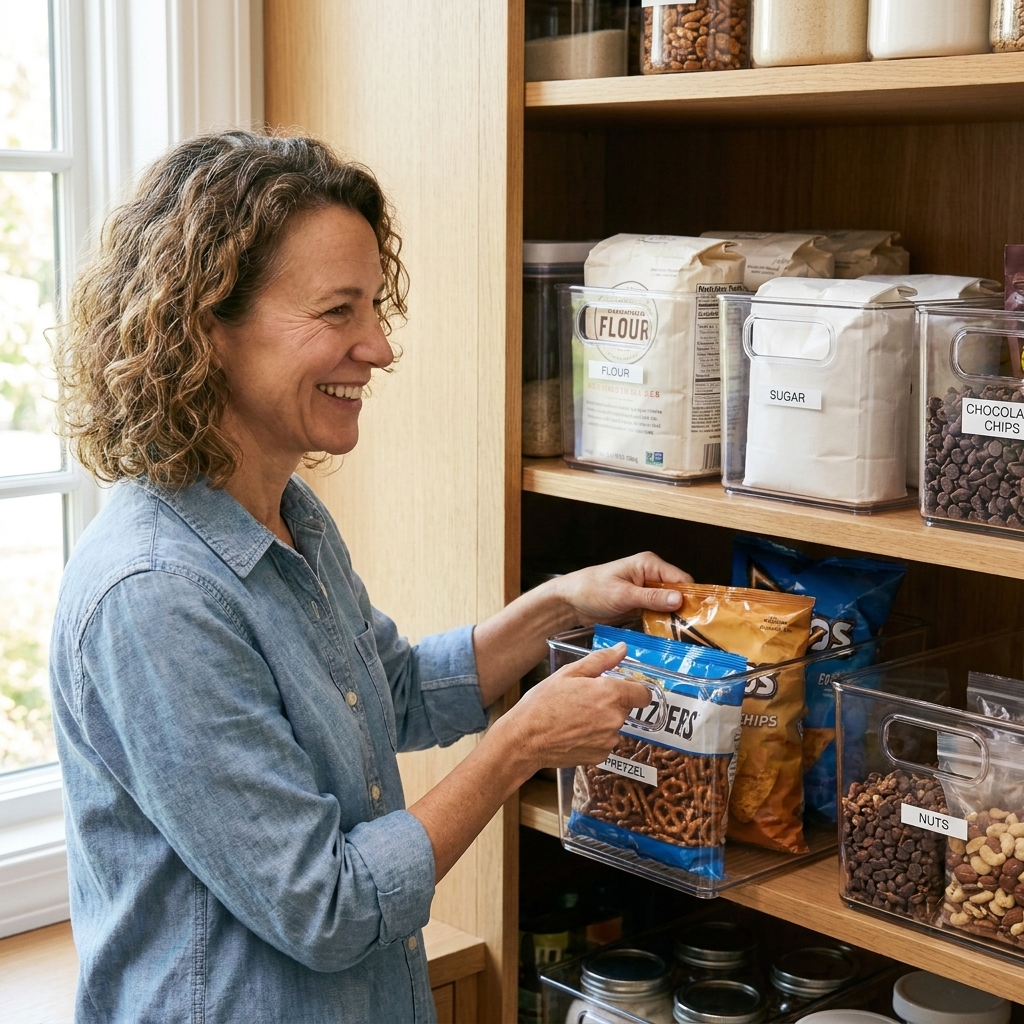
For deep shelves, pull-out bins are the closest thing to adding drawers without calling a contractor. I am talking about lift-out, handled bins you slide forward, not hardware-mounted pull-out shelves.
I love clear acrylic because you can see what is inside at a glance, but sturdy plastic works too.
- Use for: snacks, baking supplies, taco night packets, breakfast bars, small jars
- Look for: built-in handles, straight sides (maximizes space), easy-to-wipe plastic
- Set-up tip: leave about 1 inch of space above the bin so you can lift it out if needed
My rule: one bin equals one category. If a category does not deserve a whole bin, pair it with a neighbor (example: “pancake stuff” can share with “syrups and toppings”).
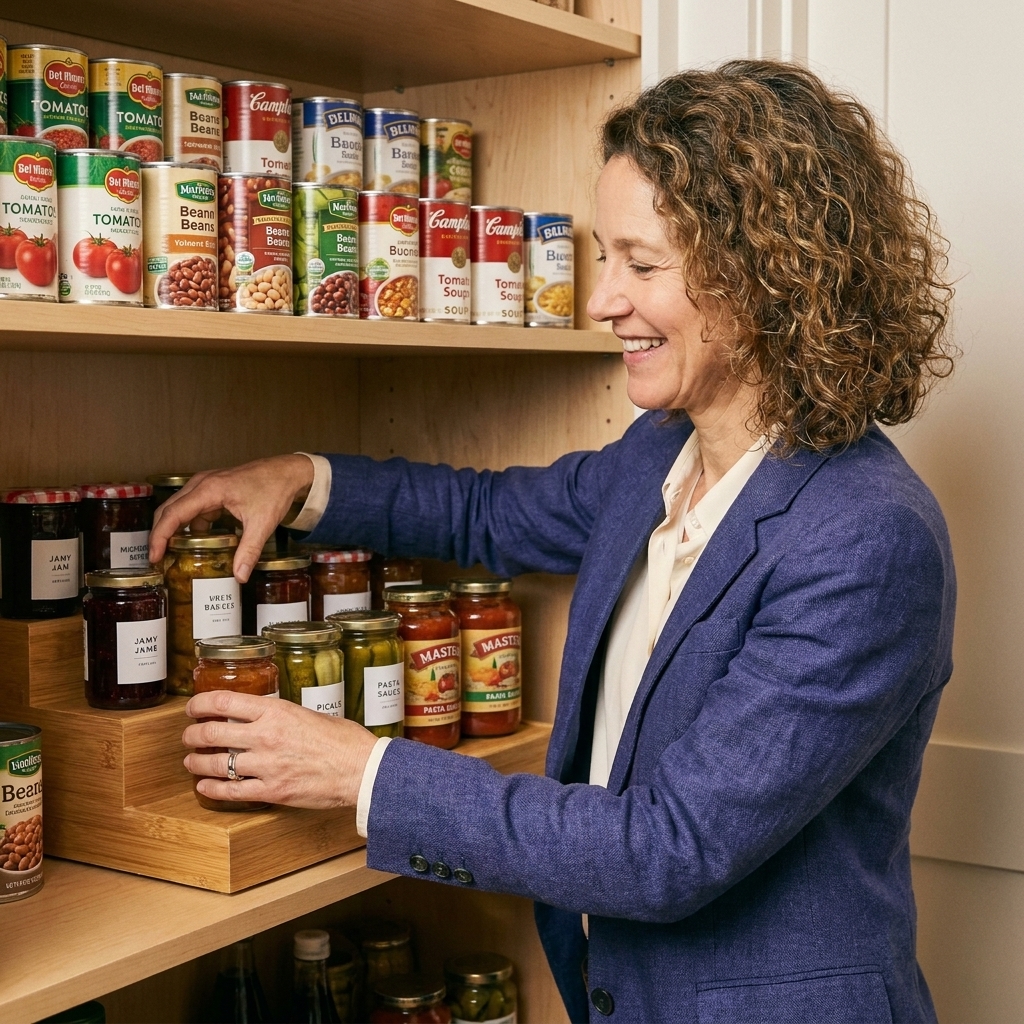
2) Tiered risers
Tiered organizers stop the “can wall” problem where you only ever see the front label. Depending on your riser height and shelf clearance, you can often see multiple rows at once, which is the whole point.
- Use for: canned goods, sauces, nut butters, jams, spices (if shelf height allows)
- Placement tip: keep risers toward the front half of the shelf so you can read labels without leaning into the pantry like a spelunker
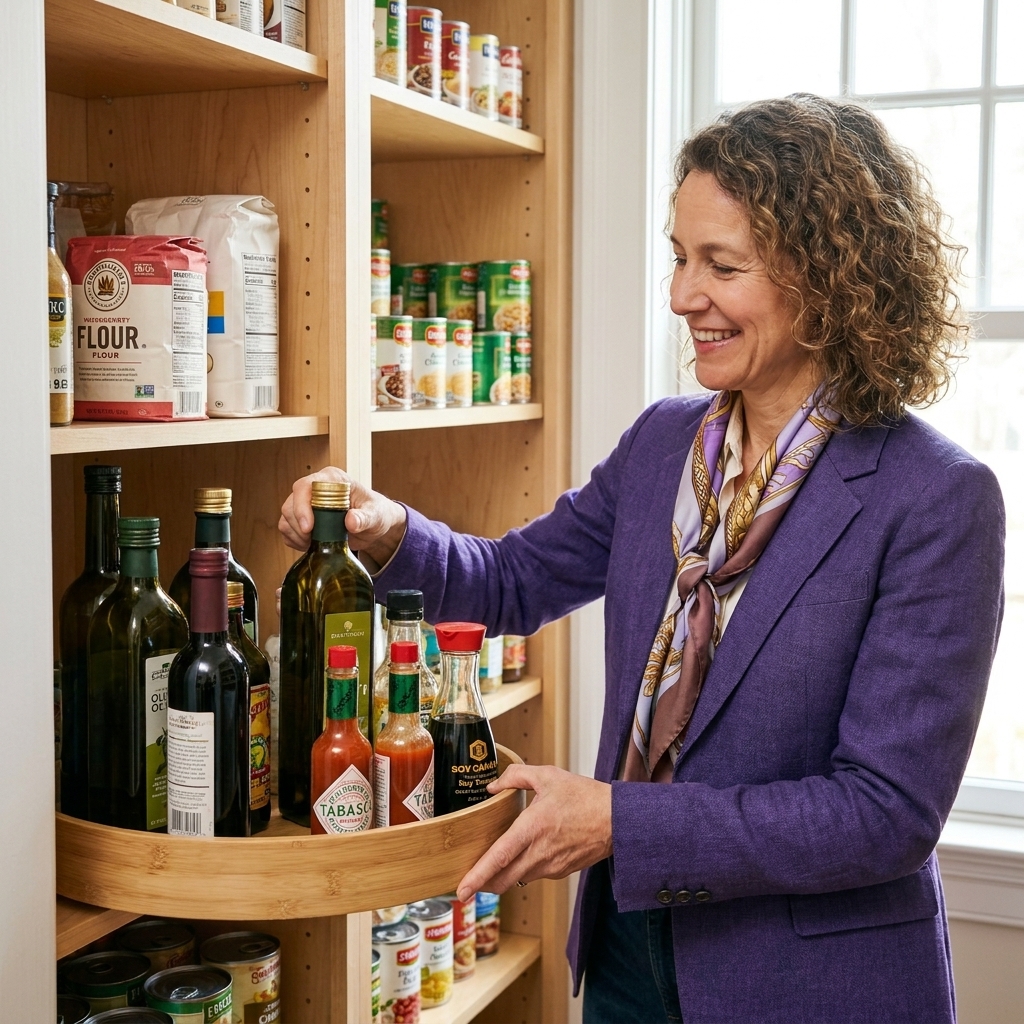
3) Lazy Susans
Lazy Susans are perfect when items are constantly tipping over or getting lost, especially on deep shelves where turning beats reaching.
- Use for: oils, vinegars, soy sauce, honey, salad dressings, small condiment bottles
- Pick a style: a rimmed turntable prevents bottles from sliding off during the spin
Reality check: skip the Lazy Susan for very tall, top-heavy bottles unless you have a super stable, rimmed style. (And if it is glass, I like it lower in the pantry anyway.)
4) Dividers and file organizers
Bagged items are the deep pantry’s worst behavior. They slump, slide, and bury everything behind them. The solution is to store them upright like files.
- Use for: chips, tortillas, bread, snack multipacks, resealable baking ingredients
- Tools: sturdy shelf dividers, magazine files, or a wide bin used vertically
5) Stackable bins for backstock
Backstock can be helpful, but it can also quietly multiply. If you keep extras, contain them and cap them.
- Use for: extra pasta, extra canned tomatoes, spare cereal, duplicates from warehouse stores
- Set a limit: “one extra” per item, or one designated backstock bin per zone
If you cannot see your backstock without moving five things, you have too much backstock.
Create zones that prevent doubles
Zoning is what keeps you from buying your third paprika. Think like a grocery store. Group by how you shop and cook, not by what looks pretty.
Zones that work
- Breakfast: cereal, oatmeal, pancake mix, syrups, coffee and tea
- Lunch and quick meals: soups, ramen, mac and cheese, tuna, canned beans
- Dinner building blocks: pasta, rice, grains, sauces, broths
- Baking: flour, sugar, chocolate chips, sprinkles, extracts
- Snacks: grab-and-go items, crackers, fruit snacks
- Backstock: a single contained area, not sprinkled everywhere
Where zones go
- Eye level: daily-use items you want to reach without thinking
- Top shelves: less-used items and sealed backstock
- Bottom shelves: heavy items like drinks, large bags, and bulky appliances
Safety note: if you have the option, put heavy items and glass (big jars, oils, vinegar) lower. It is easier on your arms and kinder to your floors.
Front-row rule
This one change can help reduce food waste quickly: anything open stays in the front half of the shelf. Unopened backups go behind, in a clearly defined backstock spot.
When you open a new item, pull the backup forward. That is your built-in rotation without extra steps.
Easy FIFO rotation
FIFO means “first in, first out.” In normal-person terms: older items get used first.
How to do it
- When unloading groceries: pull the bin out, drop new items in the back, slide older items forward.
- For cans and jars on a riser: place new items toward the back row, keep older items toward the front.
- For snacks: refill from the back of the bin so older snacks stay closest to the front.
You do not need to touch every item. You just need the habit of new goes behind old.
Inventory that gets used
I am not here to assign you a spreadsheet.
But a tiny bit of inventory prevents the “Why do we have four boxes of pasta?” situation.
Option A: Whiteboard list
Stick a small whiteboard inside the pantry door.
- Make three lines: Running Low, Need Soon, Do Not Buy.
- When you notice you are low, add it immediately.
- When you buy it, erase it right as you put groceries away.
Option B: Bin max card
For bins you constantly overbuy (snacks, baking chips, broth), tape an index card to the shelf edge in front of that bin and write the max quantities you want to keep.
Example: “Tortilla chips: 2 bags max.” This is boring. It is also wildly effective.
What goes in the very back
The very back of a deep shelf should not hold small, loose items. As a rule of thumb, treat the last section of shelf space as a “no loose stuff” zone and reserve it for:
- Backstock you can lift as a unit (one bin)
- Large, stable items (paper towels, big cereal containers, bulk boxes)
- Occasionally used items you will not forget (serving platters, bulk bags in a bin)
If you find yourself saying, “I forgot we had that,” the back zone needs to be contained better or downsized.
10-minute weekend reset
This is the maintenance routine that keeps your system from slowly melting.
- Pull out each bin and toss obvious trash (wrappers, empty boxes).
- Do a quick front check for anything open that should be used soon.
- Slide newer items back and older items forward.
- Wipe one shelf if something spilled. Not all shelves. One is enough.
- Add 1 to 3 items to your Running Low list.
Put on a podcast, light a candle, and enjoy the weird peace that comes from knowing your pantry is not plotting against you.
Troubleshooting
It still gets messy
Your categories might be too narrow. Real life likes bigger buckets. Combine micro-categories into broader ones (example: “granola bars,” “fruit snacks,” and “crackers” become “kids snacks”).
I cannot reach the back
Use more pull-out bins and fewer items sitting directly on the shelf. If you have to move six things to reach one, the shelf is not organized. It is just stacked.
It is deep and dark
Add a stick-on motion sensor light. Visibility prevents duplicates and helps you notice what needs to be used. For me, this is one of those tiny upgrades that feels oddly life-changing.
I keep buying doubles
Make a “Do Not Buy” list inside the pantry door for the top repeat offenders. For most households it is: pasta, rice, canned tomatoes, broth, snacks, and baking chips.
Shopping list
- 2 to 6 clear pull-out bins with handles (start small, add as needed)
- 1 to 2 tiered risers for cans and jars
- 1 rimmed Lazy Susan for oils and sauces
- 2 shelf dividers or file organizers for bagged items
- 1 small whiteboard or notepad for a running list
- 1 motion sensor pantry light (optional, but very helpful)
FAQ
Should I decant pantry staples into matching containers?
Only if it genuinely helps you use food faster. Decanting is great for flour, sugar, rice, and cereal if you have pests or stale-food issues.
If you decant, label the container (item name, and ideally an expiration or purchase date). And if allergies are a concern in your household, keep the original packaging somewhere so ingredient and allergen info is easy to check.
For everything else, focus on visibility and access first.
How do I organize a deep pantry without buying anything?
Use shoeboxes, small cardboard boxes, or reusable grocery bags as temporary bins. Group by zone, pull the “bins” forward to access what is behind, and apply the front-row rule for open items.
What is the best layout for a family pantry?
Put kid snacks and lunch items at their height, dinner building blocks at adult eye level, and backstock up high or down low. The best pantry is the one that reduces decision fatigue on busy days.